It’s the Best of the ABS today! We interrupt your regularly scheduled programme to bring you this cute necklace from Claire of Something to do from last year – whip yourself up an Autumn treat by following this tutorial.
—————————————————————–
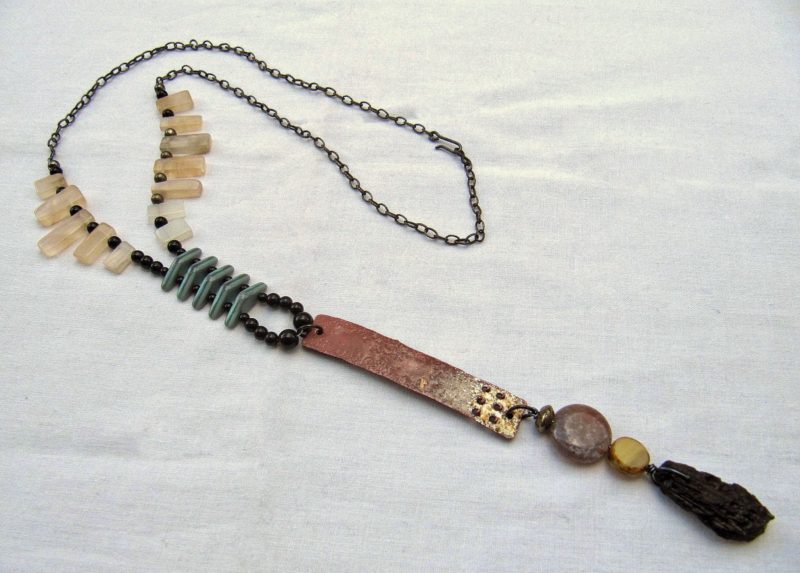
I love long thin pendant necklaces. I often make shorter necklaces and, perhaps, I more frequently make shorter necklaces to sell. However, when it comes to the day-to-day designs that I find most comfortable to wear, I’ll go for a piece where the focus is on a long pendant drop, rather than on the neckline. Unfortunately, such pieces are a huge pain to photograph. Nevertheless, I do rather like this piece.
It’s highly unlikely that you’ll have everything I’ve used here in your stash! However, there are plenty of possibilities for substituting different items. It’s just a case of bringing together like shapes to get a similarly cohesive look. You may want to go for a totally different colour scheme. The focal is an enamel plate from 4 Ophelia. I’ve mixed it with semi-precious stones and some czech glass. Here are the steps to make it.
Thread a tektite drop an inch or so onto 10cm of 22 gauge hematite wire. Bend it round the top and wrap the shorter wire length round the longer and trim. Thread on a cream glass coin, a jasper coin, a pyrite rondelle, then make a wrapped loop. Attach this to the bottom of the enamel panel with a jump ring. Then add another jump ring to the top of the panel.
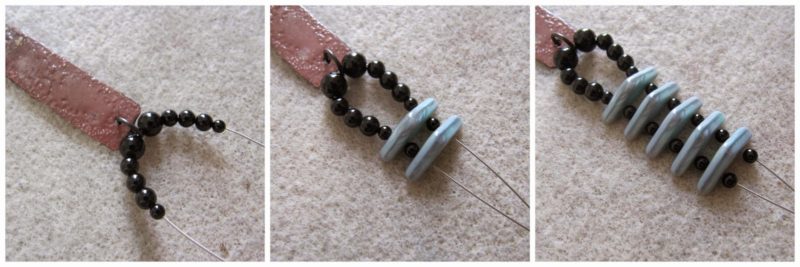
In the next steps I’ve used a combination of 2mm, 4mm, and 6mm black agate rounds.
Take about 30cm of beading thread and pass it through the jump ring. Thread a 6mm round on either side of the jump ring. Next add three 4mm beads on either side, then follow them with a 2mm round on each side. Take a two hole bead and take the two ends of your thread through either hole, then add a 2mm round on each thread. Repeat this until you have five of the two hole beads, finishing with 2mm rounds. Then add a 4mm round on each side.
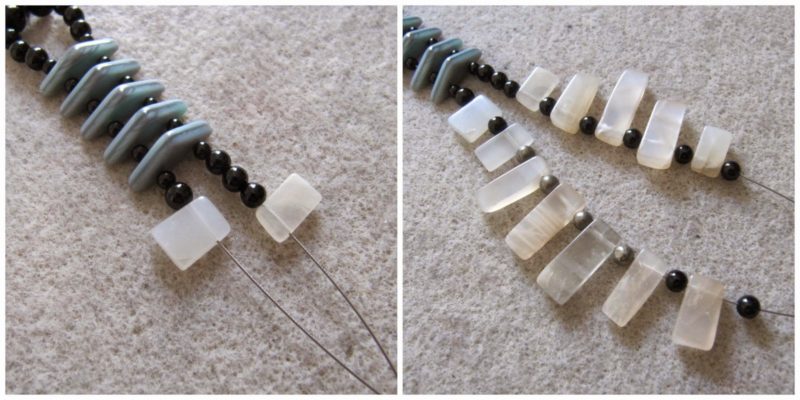
Up to this point, the design has been totally symmetrical. At this point I’ve added in a subtle bit of asymmetry to give some extra interest. On the right side of your necklace add another two 4mm rounds. Take some moonstone rectangular stick beads of graduated sizes and sort them so that you have one set of seven pieces and one set of five pieces, each going from small to large then back to small. The set of five will go on the side where you’ve added the extra 4mm rounds. Start adding the moonstone, interspersing them with 4mm rounds. However, on the side with seven moonstone beads, swap four of the agates for 4mm pyrite rounds, as shown in the image. If you are looking for an alternative, co-editor Rebecca stocks some faceted brass rounds in her supply shop which would be a great substitute here!
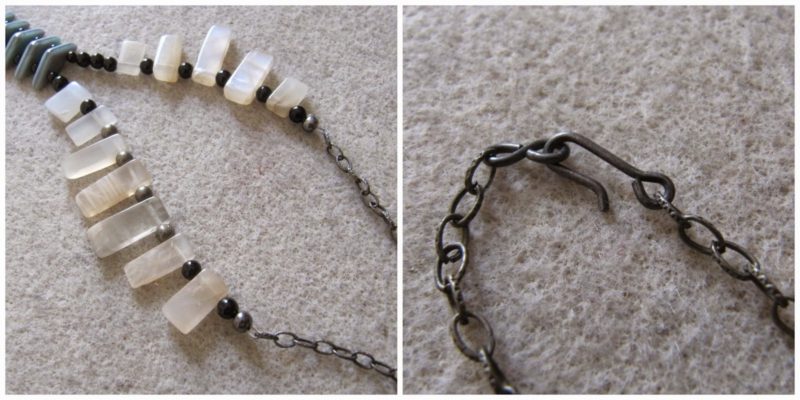
To finish, take about 30cm of chain and attach the ends of your thread to the ends of the chain using crimps and covers. Finally, open your chain at the centre point and add in a hook and eye clasp.
And your necklace is complete!
Bye for now,
Claire


thecolorofdreams
September 19, 2015 at 3:43 pmI love your necklace and tut. You have given me some great ideas to use some 2-hole beads that I made for a bracelet but never used. I think I will try to string them together as a long pendant with smaller beads separating them.
motidana
September 20, 2015 at 4:53 amLoved the necklace and the tutorial 🙂
Dawn of LaTouchables
September 20, 2015 at 4:04 pmI find longer pieces difficult to photograph as well, and I completely enjoyed these photos of your splendid piece! Great tutorial, Claire.