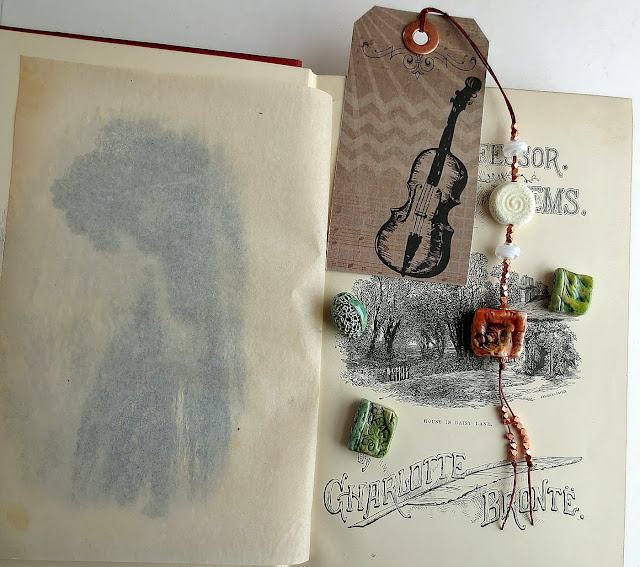
I would be very happy to be receive a handmade bookmark since I love to READ and to BEAD. So I am thinking you might be also. For a simple and quick to make Holiday gift, I came up with this tutorial for a bookmark using art beads and Kraft card stock.
white spiral imprinted glass and small glass beads by
Genea beads; green oval bead with surface texture by Natalie of
NKP beads. small colored porcelain beads by Mary Harding
Supplies
Card Stock I used a Kraft color from JoAnn’s and other craft supply stores
Copper washer size 1/4 inch (hardware store or Harbor Freight)
Waxed Linen Jewelry Accord and White Clover Kiln
Elmer’s Glue stick ( it is drier than liquid Elmer’s and doesn’t warp the paper as much)
Artist beads
Book Beads
Small 4 mm metal beads mine came from Ornamentea
Package Tags available at craft stores like Michaels and JoAnn Fabrics
E6000 glue
Krylon Acrylic Spray
Tools
Hole punch the kind used to put holes into notebook paper
scissors
1. Cut out two pieces of Kraft card 2 and 1/4 inches wide and 6 and 1/2 inches long.
2. Glue them together.
3. Using a Package Tag as a model, mark the top edges and hole placement at the top of the glued together strips.
4. Clip the top edges where you marked them.
5. Use the paper hole punch to make the center hole.
6. Apply E6000 glue to the copper washer with a toothpick
7.Attach the copper washer to the center top hole that you punched to reinforce it.
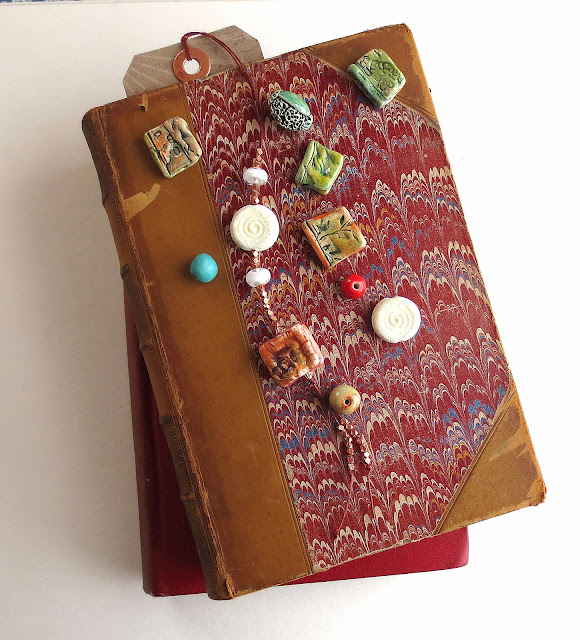
8.Choose an image for your bookmark . I photographed a stack of books that I would like to read. If you belong to a book group you could make a photo of books you will be reading. (You can also purchase printed tags with images and then follow along with the tutorial using them. If you choose that option I recommend gluing two together to make them more durable.)
Glue your image to your book mark. Use a glue stick. Be generous. Place the bookmark under several heavy books to dry so it will lie nice and flat.
9 Once it is dry, cut a 30 inch piece of waxed cord, fold it in half and and make a Lark’s Head knot through the copper washer reinforced hole going from the front to the back of the book mark.
10. Make a mark on you waxed linen at least 2 inches from the top of your bookmark. Undo your Lark’s head knot and begin stringing beads on the folded edge of your doubled waxed linen being sure to leave at least the 3 inches( longer now that it is not on the bookmark) you marked off without beads at the beginning so that your book mark can be soft and supple when it goes over the book’s spine or cover .It is much easier to string your small hole beads using the the folded end of you waxed linen than trying to fit the two lengths together through the small beads.You can also bead from the two strand cut end and put on your bigger art beads and work from both the bottom and the top.
In addition to the book bead and the artist beads, I used 4mm beads with holes that are large enough to go over the waxed linen. I knotted both strands of the waxed linen below the book bead and then added a few more small beads to each strand of the linen and tied one knot in each.
11.Reattach your string of beads through the copper reinforced hole by making a Lark’s Head knot from front to back as before. Check to make sure you left enough room for your string of beads to gently flow over the book’s spine or cover. Try it out on a book to be sure. If you need more room you can easily remove extra beads by undoing the Lark’s Head knot and taking them off. To preserve your bookmark you can use an acrylic spray like Krylon Workable Fixatif.
12. Enjoy giving your art beads bookmark gift.
Posted by Mary Harding


TesoriTrovati
December 16, 2013 at 3:16 pmSuch an awesome idea! Thank you for sharing it with us Miss Mary. It is nice to have you on the Art Bead Scene. Enjoy the day! Erin
Keith@ Vintage Crab Jewelry
December 16, 2013 at 3:30 pmGreat tutorial! The beads look wonderful and I love the copper washer idea!
Mona
December 17, 2013 at 11:43 amLove it. Thank you 🙂
Cheri
December 17, 2013 at 2:09 pmWhat a perfect gift for the teachers!
lake ave
December 17, 2013 at 2:16 pmSuper tutorial…. could make up some quick gifts!
LOVE the book bead… Mary, you are so talented!
The graphic on the cardstock opens the door to so many possibilities. Thanks, Mary!
Genea
December 17, 2013 at 4:59 pmThis is wonderful Mary! What a great way to enjoy your beads and create a thoughtful gift 🙂 xo Genea
Genea
December 17, 2013 at 5:00 pmThis is wonderful, Mary! What a great way to enjoy your beads and make a thoughtful gift 🙂 xo Genea
Sharyl
December 17, 2013 at 6:58 pmThanks for sharing this great idea! I'm finding myself at a loss for what to give for gifts and time is running out! I'd much rather make than buy! This sparks lots of new ideas for me! Thanks so much!
Janine
December 17, 2013 at 7:27 pmWhat a great idea! Thank you for sharing.
yvonne ammerman
December 17, 2013 at 7:47 pmFabulous!! Have to do this with my grandaughters.
Natalie -- NKP Designs
December 17, 2013 at 10:23 pmLove this idea! Can't wait to try it myself. 🙂
khess136
December 18, 2013 at 12:19 amWhat a lovely project! Thank you for sharing <3
Patti Vanderbloemen
December 18, 2013 at 11:07 amAwesome tutorial!! Thanks for sharing!
Gaea
December 25, 2013 at 7:55 pmReally useful and sweet!