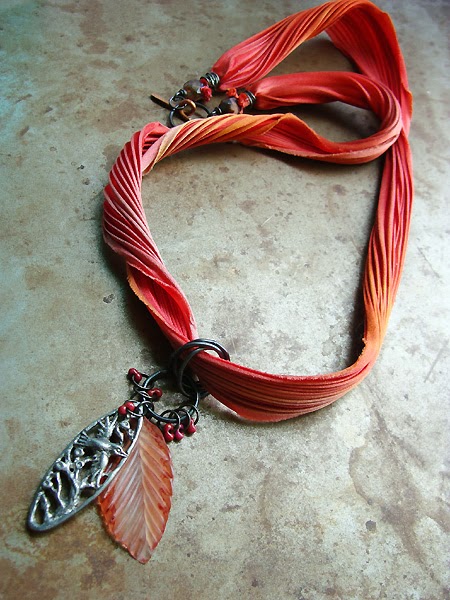
Feast your eyes upon the glory of hand-dyed Shibori ribbon! The color is amazing, the texture is petal soft silk, it’s pure luxury and it’s been sweeping the beading world over the last few months. Brought to us by Lisa Kan over at Aria Design Studio, this ribbon goes through a labor-intensive dying process that is true artistry.
I’ve created several projects with this amazing new ribbon for those who use art beads. I’m happy to present this tutorial featuring a simple way to finish of the ends of the ribbon to create a quick and easy necklace.
Directions:
1. String the copper spacer onto the eyepin, poke the eyepin through the center of the ribbon at 1/4″ from the top. Pull the eyepin until it reaches the copper spacer.
2. Gather the ribbon around the eyepin, hold firmly while wrapping the wire around the ribbon until it is secure.
3. Continue wrapping the wire until you have a messy wrap, trim the ends and tuck the ends of the wire in with chain nose pliers.
4. String the glass bead onto the eyepin and create a wrapped loop.
5. Repeat 1 – 4 on the other side of the ribbon. Add a 15mm jump ring to one eyepin and attach the copper toggle to the other eyepin with a 7mm jump ring.
6. Open one 15mm jump ring, slide it through another 15mm jump ring, close ring. Open and slide another jump ring through both of the two jump rings to form a ‘rosette’.
7. Attach the two pendants together with a 7mm jump ring. Add a peanut seed bead to seven 7mm jump rings. Attach one beaded jump ring to jump ring attaching the pendants.
8. Open a 15mm jump ring, slide on pendants and 3 beaded jump rings on each side, add the jump ring to the ‘rosette’, close jump ring.
Resources:
Pewter pendant: Green Girl Studio. Leaf Pendant: Vintage Meadow Artworks. Jump rings: Rings & Things. Shibori ribbon: Aria Design Studio. Peanut seed beads: Out on a Whim Beads.


